Disable automatic updates on Sony Xperia XA-1

Personally, I think updates are terrible. Those updates are optimized for newest model and not necessarily provide fixes to your particular device. In this post, I’m gonna share 4 places that u might wanna check to turn off those horrible updates for Sony Xperia XA1.

1. Turn off updates from Software update

Settings => About Phone => Software Updates => 3 dots on the top right corner

Change Allow automatic updates option to Do not update automatically


2. Turn off updates from Xperia updates

What’s New => Settings => Turn off Automatic updates


3. Turn off updates from developer options

You need to turn on Developer mode first by going to Settings => About Phone => tap Build number 7 times

In the developer options, you will want to turn off Automatic system update as shown in the screenshot


Bonus: Disable Google Play Store 

Note: I really dislike about these auto-updates and unfortunately, if you enable google play store, goolge will always install those updates for you regardless whether you like it or not. The only way to stop google from updating is disabling Google play store and uninstall Google Play Service back to factory default. Check out how to disable Google updates on android devices here.


Hope this post is somewhat useful 😉


How to Stop Google Play Store from Auto-updating?

I’ve seen many posts teaching people how to stop google from auto-updating apps, but never found one for google self-updating app store and its services.

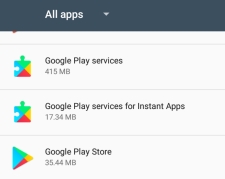
Unfortunately, the only solution that I found available is to disable Google Play Store and reset Google Play Service to factory default. In this post, we will be working on :

  1. Google Play Store,
  2. Google Play services, and
  3. Google Play services for instant app.


5 steps to Disable Google Play Store

If you disable google play store, you won’t be able to download new apps from the store (obviously). So, what I often do is to think about all the apps on I want to download beforehand, then enable the service and download all of them in one go. After downloading all the desired apps, I disable the play store again to stop any background checking.


Reset Google Play Service back to Factory version (Don’t Disable!)

We don’t want to disable Google Play Service because 90% of the apps are heavily relying on Play Services for notification services and what not. (Sigh… ) Anyway, to reset back to the factory, it’s the same basic flow as above so I just summarize it in one screenshot.

Force Stop => Uninstall updates => Disable


Uninstall Google Play services for instant apps


I have no idea what this service does. I know it doesn’t come with default and it’s probably some junk that google installed later on with new updates. Might as well uninstall it along with this post. Who knows what google is going to install on our phone secretly next :/


A final note

Once you downgrade Google Play Service, it will continue to bug you with a warning like:

Update Google Play services
[App Name] won’t run unless you update Google Play services.

The truth is, it will still work so don’t fret. If it doesn’t, you just need to enable Google Play Store back on. It will install all the updates imaginable for you again if that is what you are into. 🙂

Cheers!


Android – Can’t Find Theme.AppCompat.Light

Eclipse is so weird. The resources can seem to wonder off by themselves. The project itself was working last night, but gives me the following error in style.xml today.

<resources xmlns:android="http://schemas.android.com/apk/res/android">

    <style name="AppBaseTheme" parent="Theme.AppCompat.Light">
    </style>

    <style name="AppTheme" parent="AppBaseTheme">
    </style>

</resources>
error: Error retrieving parent for item: No resource found that matches 
the given name 'Theme.AppCompat.Light'.


After tracing the error a little bit from google, I learned from a solution from StackOverflow[1] that my appcompat was off..

error


To fix this, all I did was:

  1. Right click on the project
  2. Select Android from the left hand side
  3. Add the appcompat_v7 folder and hit okay.

So now, instead of having a red cross mark on the screen shown above, it should now have a green tick beside the newly added appcompat.

And that’s all. 😀


Source:
[1] http://stackoverflow.com/questions/17870881/cant-find-theme-appcompat-light-for-new-android-actionbar-support